How to create river drainage system in QGIS

How to create river drainage system in QGIS

Step by Step Guide

October 06, 20232 min read

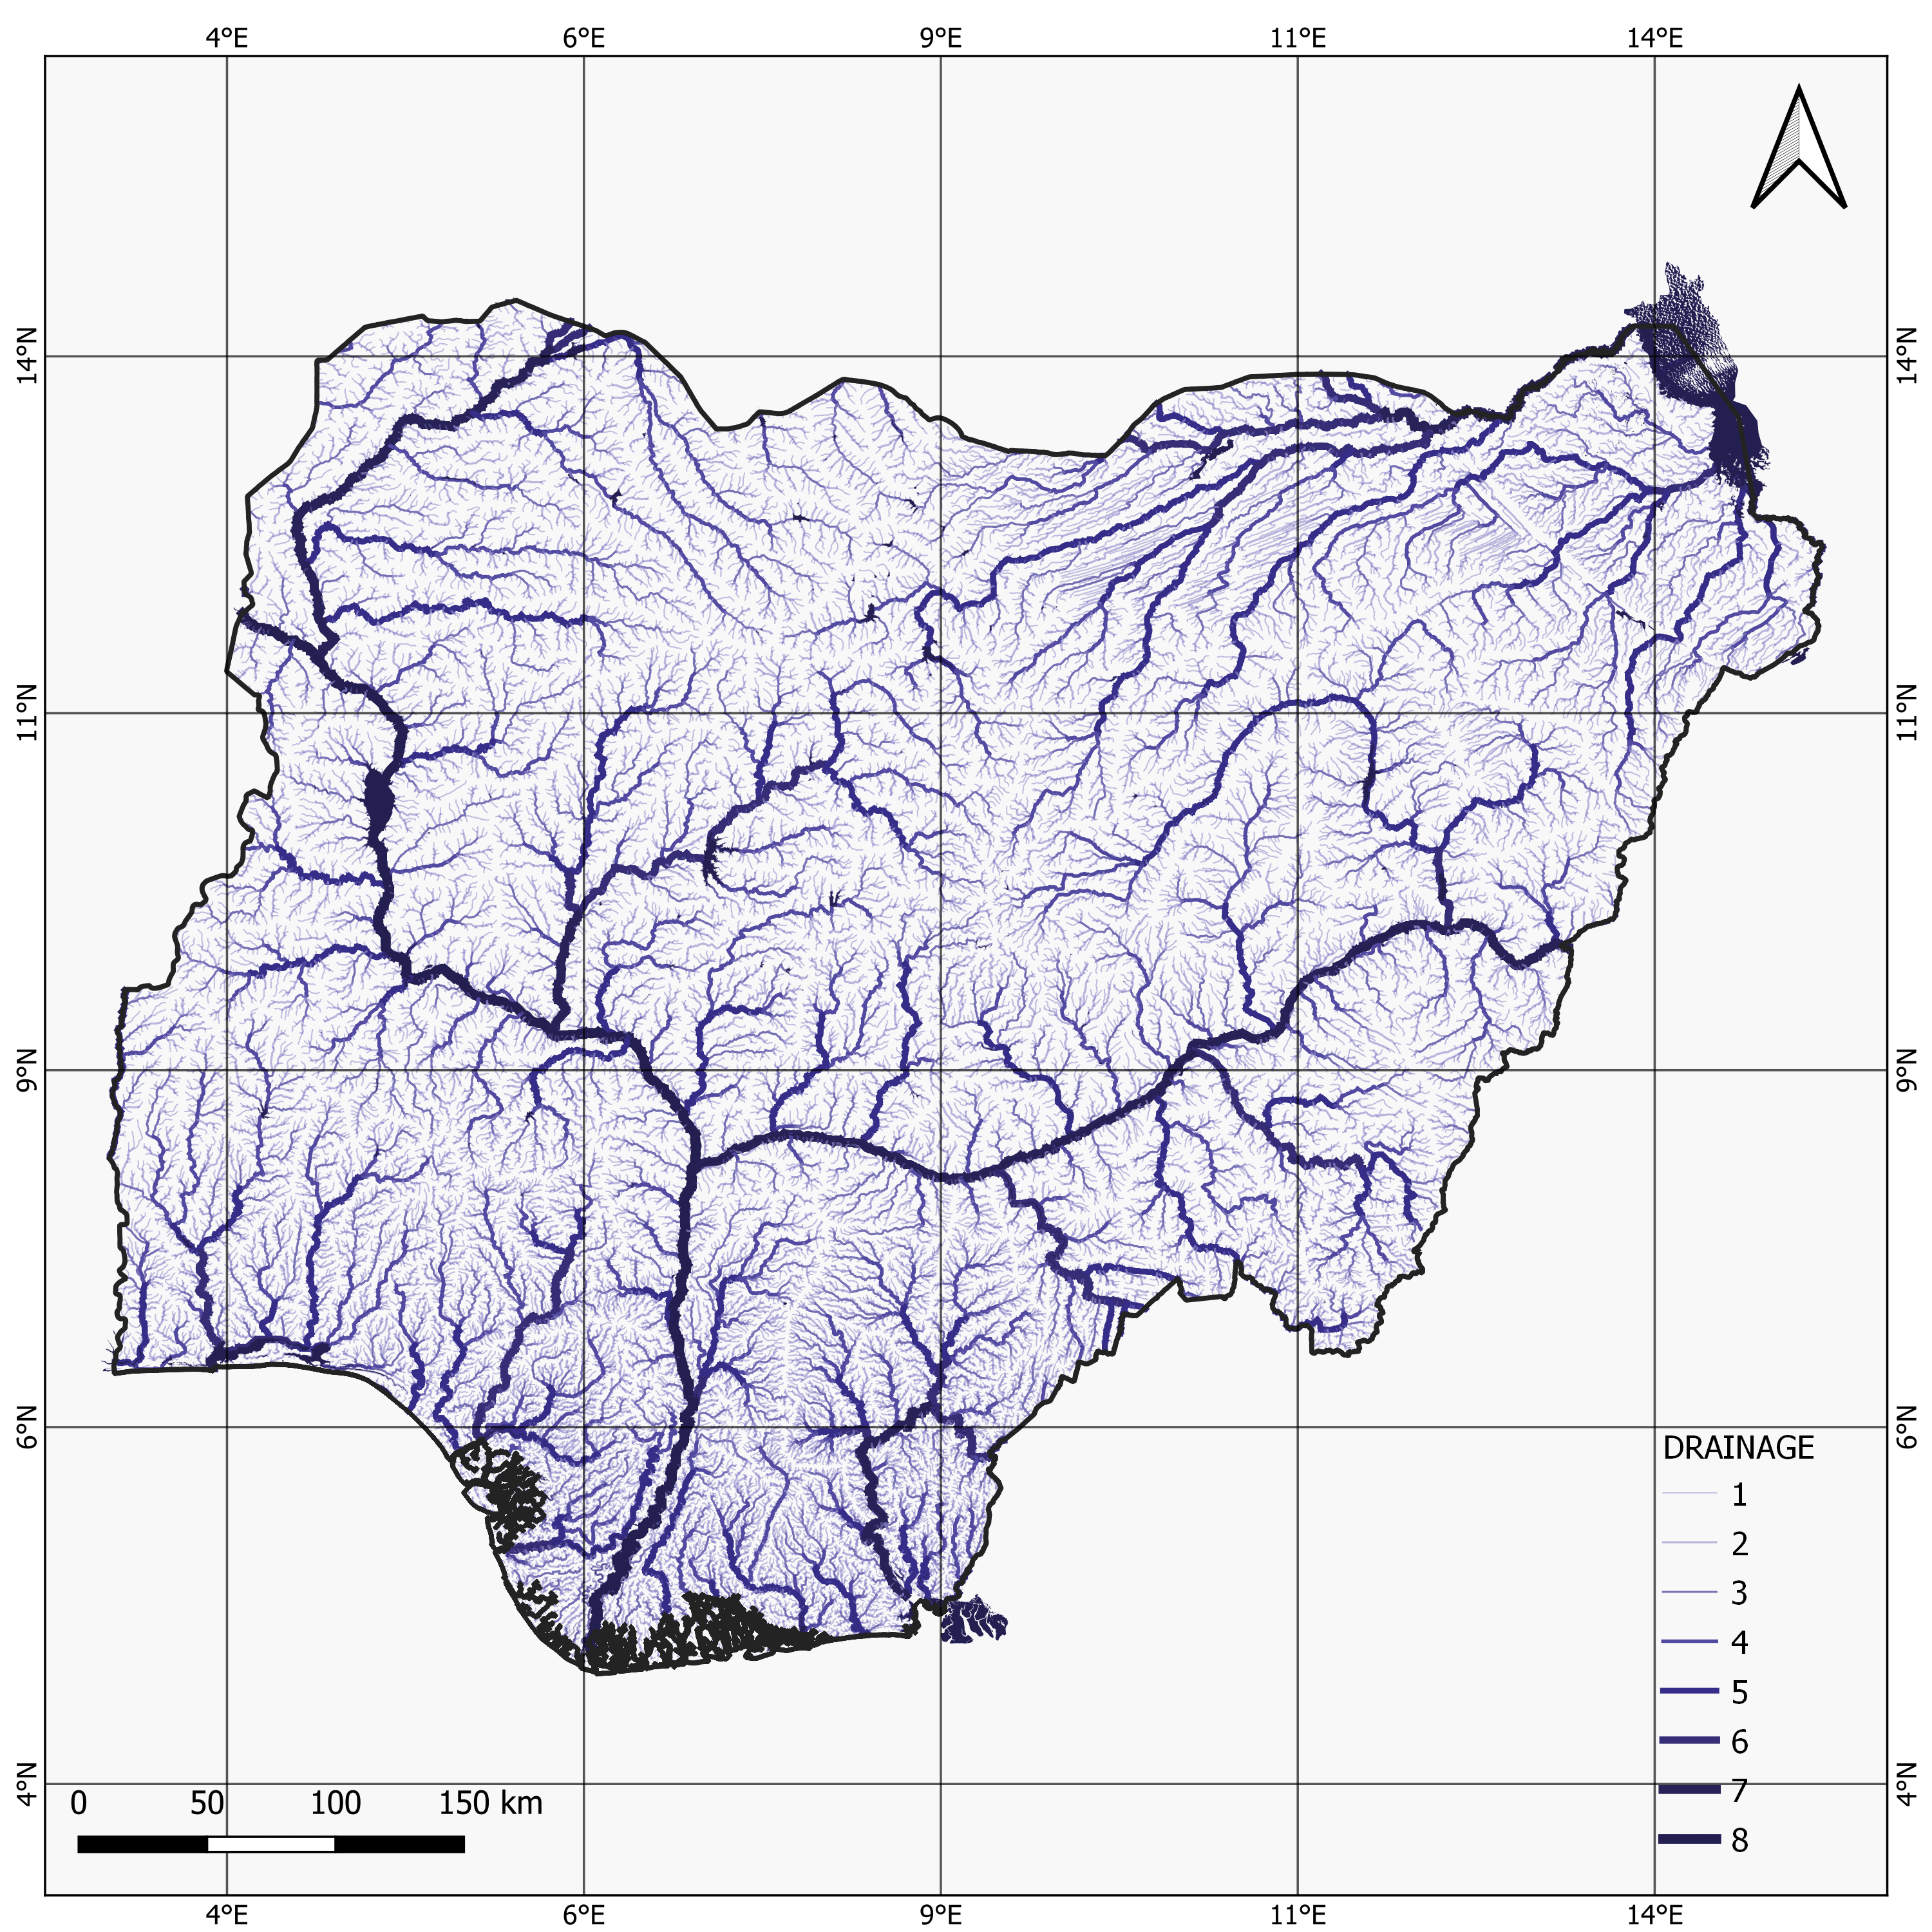
River drainage systems, also known as river basins or watersheds, are intricate natural networks of rivers, streams, and tributaries that collect and transport water from a specific geographic area to a common outlet, typically the ocean. These systems play a vital role in the Earth's hydrological cycle, influencing ecosystems, water availability, and human activities within their boundaries. Understanding river drainage systems is essential for managing water resources and conserving our environment.

Here are step by step guide on how to create a river drainage system in QGIS.

HAPPY MAPPING

DATA USED: HydroRiver, Water Shapefile.

STEP 1: Open QGIS Software and add the HydroRiver shapefile.

Note: The river drainage is in Geodatabase format. So, In my own case, I had to export the river drainage as a shapefile and name the shapefile "WATERNG". You can name yours whatever you like.

1. Add River drainage
STEP 2: Now let work on the River drainage Symbology. Right click on the river drainage in TOC(Table of content) and hit the "Properties" option or you can double click on the River drainage shapefile to access the symbology.
2. Accessing Symbology
Firstly, Change the layout symbol style from Single symbol to Cartegorized, Set up the Value, Symbol, Color ramp and hit the Classify button as showing in the diagram below.
3. Symbology Settings
4. Result
4. Result
we are not satisfied with the result. we need a beautiful Result. To do this, we have to modify the drainage lines.

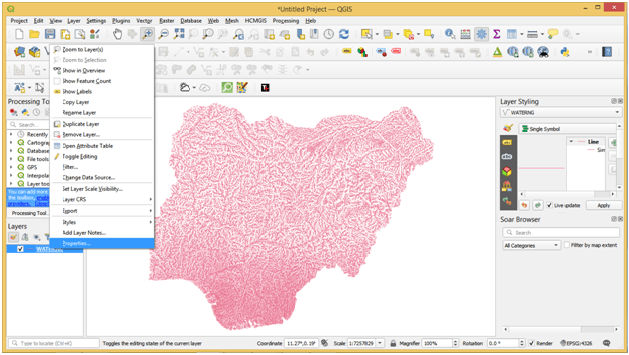
STEP 3: You can modify the settings the way you like but if you are interested in using my settings, here it is below.

Line 1, Color: #7D77C3, Transparency: 46%, Stroke Width: 0.16.

Line 2, Color: #9892CF, Transparency: 66%, Stroke Width: 0.26.

Line 3, Color: #756F64, Stroke Width: 0.26.

Line 4, Color: #514AA0, Stroke Width: 0.46.

Line 5, Color: #352D88, Stroke Width: 0.76.

Like 6, Color: #352D75, Stroke Width: 0.96.

Line 7, Color: #272258, Stroke Width: 1.16.

Line 8, Color: #241F51, Stroke Width: 1.26.

5. Modifying Symbology
6. Result
6. Result
STEP 4: Add waterbody Polygon Shapefile. This Shapefile contains the lakes, rivers, reservoirs and others.
7. Add waterbody polygon shapefile
STEP 5: Set up the symbology of the Shapefile by changing the color. (I use this fill color settings; #241F51).
8. Set up the Water Shapefile Color
9: Result
9: Result
STEP 6: You can add the boundary shapefile and change the fill color to No Brush to make the shapefile hollow. And also you can increase the stroke width of the boundary shapefile as well. Your choice!!!
FINAL MAP
FINAL MAP
You can reach me on here

Cartographymodern mapQGISriverSurface drainage

Join the community!

We're a place where geospatial professionals showcase their works and discover opportunities.

More from Balogun Temitope

Explore More Articles